


Imagine a developer presentation for a new apartment. The plan is approved. The joinery drawings are moving. The interior designer has selected a warm oak, a pale stone, brushed metal fittings, and a boucle chair. Everyone agrees on the written specification, yet each person is picturing a different room.
One image can expose that gap. The ceiling may feel lower than expected. The island pendant may block the main sightline. The selected stone may look too busy beside the oak. The chair may be correct on the schedule but too large in the actual circulation zone.
That is the practical value of interior 3D rendering. It makes an unbuilt interior discussable while there is still time to change it.
The image also has limits. A render communicates design intent based on the information supplied. It does not certify dimensions, coordination, code compliance, daylight performance, acoustic comfort, product availability, or the colour of a physical sample under every real light source. A beautiful image becomes dependable only when its source, assumptions, review status, and intended decision are clear.
This guide explains what to commission, what to send, how the seven-stage process works, what creates realism, how to control FF&E and finish accuracy, what affects price and timing, and how to choose a studio that can support professional decisions.
What is interior 3D rendering and when should teams use it?
Interior 3D rendering is the process of building or preparing a digital room scene and calculating still images, animation, panoramic views, or interactive experiences from it. Teams should use it when a floor plan, sample board, or verbal explanation cannot show how space, finishes, furniture, light, and atmosphere will work together.
The output may look like a photograph, but it begins as structured project information. Walls, ceilings, openings, joinery, fixtures, furniture, materials, luminaires, and cameras are placed in a three-dimensional scene. A render engine then calculates how the scene appears from a selected viewpoint.
That simple definition hides two separate jobs. The first is interpretation. The studio must understand the design and identify gaps in the source information. The second is image making. The studio must translate that design into a clear, believable composition without inventing facts that matter to the decision. Interior 3D visualization connects both jobs through one controlled scene.
Our interior rendering service is built around that combination of technical reading and visual communication. It is not merely a software output that we provide to clients.
How is a render different from a plan, moodboard, and physical sample?
A plan explains arrangement, a moodboard explains direction, a physical sample shows a real finish, and a render shows how selected information may come together from one viewpoint. Each format answers a different question, so a render should connect them rather than replace them.
| Design information | What it communicates well | What it cannot show alone |
|---|---|---|
| Floor plan | Room boundaries, circulation, furniture footprint, and relationships | Eye-level experience, material response, and atmosphere |
| Elevation | Vertical dimensions, joinery composition, openings, and alignments | Overall spatial depth and combined sightlines |
| Moodboard | Style, palette, precedent, and emotional direction | Exact product, scale, placement, and final combination |
| FF&E schedule | Product identity, supplier, dimensions, finish, and quantity | How the complete room feels from a chosen view |
| Material sample | Physical colour, texture, gloss, and tactility under observed light | Its appearance across the full room and multiple light conditions |
| Render | Combined spatial and visual intent from a defined camera | Verified construction, measured performance, and universal colour accuracy |
A moodboard can contain inspiration images that conflict with the specified products. One reference may suggest dark walnut while the schedule names smoked oak. Another may show a soft north-light atmosphere while the actual room faces west. Interior 3D visualization should not silently choose between them. The discrepancy belongs in the clarification log.
The same rule applies to samples. A photographed swatch is useful, but its colour depends on the camera, white balance, screen, and surrounding light. The physical approved sample and manufacturer data should control the specification. The render should be reviewed as a visual translation of that source.
For teams using 3D rendering for interior design, decisions become easier when every reference is labelled as exact, indicative, or inspirational. That one classification prevents many late revisions.
Interior architectural rendering connects these references when the source hierarchy is clear. It should show the agreed combination without weakening the authority of drawings, schedules, and samples.
Who benefits from interior visualization?
Interior designers, architects, developers, contractors, marketers, operators, and end clients benefit when the visual is designed around a real decision. The audience changes what the image must emphasize and how much technical evidence it needs.
An interior designer may need to compare two joinery and fabric schemes. An architect may need to protect ceiling alignments and spatial proportions. A developer may need a coherent set of launch images. A fit-out contractor may need clear visual intent before shop drawings are complete. A buyer may simply need to understand what an off-plan home could feel like.
Residential 3D visualization often focuses on comfort, daylight, material harmony, storage, and the emotional logic of daily life. A family kitchen must feel usable as well as polished. A bedroom must show scale without making the bed or glazing look larger than reality.
Commercial interior visualization often carries more stakeholders and operational requirements. A hotel lobby, retail unit, workplace, restaurant, clinic, or education space may need to communicate capacity, brand cues, circulation, durability, lighting layers, inclusive use, and repeatable details across many areas.
The image purpose also changes by project stage.
| Project moment | Main audience | Useful question for the visual |
|---|---|---|
| Concept | Designer and client | Does this spatial and emotional direction feel right |
| Developed design | Design team and developer | Do layout, joinery, finishes, FF&E, and lighting form one coherent scheme |
| Preconstruction | Consultants, contractor, and client | Which details remain indicative and which selections are approved |
| Sales and leasing | Buyer, tenant, investor, and agent | What experience and value does the future space offer |
| Fit-out coordination | Designer, specialists, and contractor | Are key interfaces and visible alignments understood |
| Brand rollout | Brand team, operator, and delivery partners | Can the design language stay consistent across locations |
CGI interior design work becomes far more useful when the brief names one primary audience. Trying to satisfy a technical review, a sales campaign, and a social post with one image usually weakens all three.
Which output should a project commission?
Commission still images for fixed viewpoints and close inspection, animation for sequence and movement, panoramas for user-controlled looking, and interactive formats when the viewer must explore options or navigate freely. The right output follows the communication problem, not the newest technology.
| Output | Best use | Important limitation |
|---|---|---|
| Photorealistic still | Design presentation, campaign hero, brochure, listing, and detailed review | Shows only the selected viewpoint and moment |
| Annotated study | Option review, material comparison, joinery discussion, and internal approval | Less suitable as a polished campaign image |
| 360 panorama | Remote room exploration and spatial orientation | Fixed camera position and device-dependent experience |
| Walkthrough animation | Arrival, circulation, connected rooms, and emotional sequence | More production and review time than a still |
| Interactive scene | User-led navigation, configuration, and stakeholder engagement | Requires optimization, hosting, controls, and device testing |
| 3D floor plan | Layout communication for non-technical viewers | Limited eye-level detail and atmosphere |
A 3D animation is useful when movement through the interior is part of the story. An VR and AR visualization can help when users need a more active experience. A Matterport tour is normally associated with capturing an existing space, which is a different evidence source from an unbuilt CGI scene.
Photorealistic interior visualization is often the strongest starting point because a small set of well-chosen stills can support design review, presentations, marketing, and later motion work. The scene still needs to be planned for reuse from the beginning.
When is a render too early or too late?
A render is too early when the team expects exactness without enough information, and too late when the major visual decisions are already locked into procurement or construction. Early imagery can still be valuable if it is labelled as concept intent and reviewed at the right level.
At concept stage, simplified geometry and indicative assets can test mood, scale, and composition. The team should not spend time matching the grain of an unselected veneer. At developed design, the source pack can support more exact joinery, FF&E, luminaires, and finishes. At marketing stage, image resolution, styling, audience, rights, and channel crops become more important.
Interior architectural rendering should therefore mature with the design. It should not pretend that every stage has the same level of certainty.
The RIBA Plan of Work organizes building projects across eight stages. A visualization brief can use the same stage awareness by stating which decisions are current, which information is approved, and which content remains illustrative.
Start before the presentation date leaves no review time. Do not start before anyone can identify the governing plan, main materials, or purpose. A source audit can tell the team which kind of visual is realistic now.
What can interior 3D rendering prove?
Interior 3D rendering can prove that a defined design proposal has been communicated from a stated viewpoint using listed source information. It can reveal visual conflicts and support decisions. It cannot prove that the finished room will match the image in every condition or that technical requirements have been satisfied.
Use the Realistic 3D SPACE check for every important image.
| SPACE check | Review question |
|---|---|
| Scale and structure | Are room dimensions, openings, levels, joinery, fixtures, and furniture proportions based on current information |
| Products and finishes | Which items are exact, which are close visual matches, and which are placeholders |
| Atmosphere and light | Is the scene a creative mood, a location-aware sun study, or a specialist lighting analysis |
| Camera and composition | Does the lens and viewpoint communicate the room without distorting size or hiding a known issue |
| Evidence and approval | What source, issue date, assumptions, reviewer, and decision support this image |
This framework separates realistic room rendering from visual overclaiming. A scene can be persuasive and honest at the same time.
For example, manufacturer IES files can improve the distribution of light from a digital luminaire. The Illuminating Engineering Society guide to IES files explains that these files contain fixture and angular photometric data. That does not turn a marketing render into a complete lighting calculation. Exact performance still depends on the model, reflectance, maintenance factors, calculation method, and project criteria.
The same boundary applies to daylight. A location-aware sun position can help communicate likely direction and mood. It does not replace validated daylight analysis.
How is model-based rendering different from generative AI imagery?
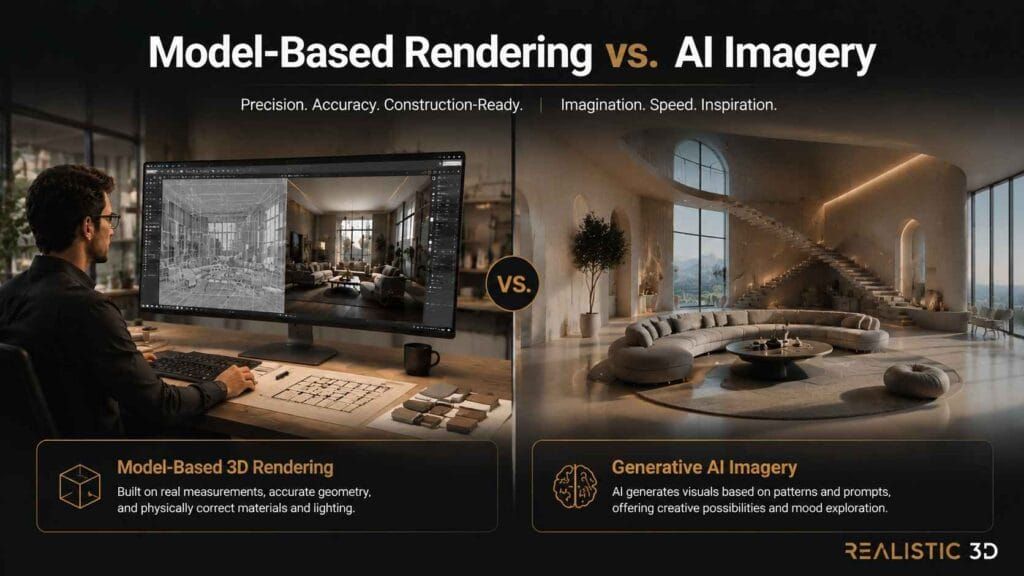
Model-based rendering uses controlled geometry, materials, assets, lights, and cameras that can be revised across multiple views. Generative AI imagery predicts pixels from prompts and references. It can explore visual direction quickly, but it is harder to rely on for exact geometry, repeatable FF&E, coordinated views, or traceable revisions.
AI can be useful during inspiration, ideation, styling exploration, background creation, or controlled post-production. It becomes risky when a generated image changes window spacing, invents joinery, alters a branded chair, removes an access requirement, or produces different details in each view.
3D interior rendering gives a design team a scene that can be inspected and updated. If the sofa changes, its dimensions and position can change in every camera. If the ceiling is lowered, the effect can be reviewed across the room. That continuity is critical for multi-view work.
CGI interior design should also keep an edit record. Any generative contribution that affects a specified element should be reviewed with the same care as a manually created element. In CGI interior design, repeatability and traceability matter whenever several views support one approval.
The practical rule is simple. Use AI to expand creative exploration where uncertainty is acceptable. Use controlled 3D scene production when dimensions, products, viewpoints, repeatability, and approval history matter.
How does the interior 3D rendering process work?
The interior 3D rendering process works through seven controlled stages that move from purpose and source audit to geometry, views, materials, lighting, review, and final delivery. The process is fastest when decisions are made in the right order and each review round has a defined scope.
The seven stages are not software commands. They are decision gates. A studio can model quickly and still lose days if the camera, FF&E, or lighting direction changes after final-quality output begins.
3D rendering for interior design becomes more predictable when each stage ends with one clear approval question.
| Stage | Main output | Approval question |
|---|---|---|
| 1 Brief and source audit | Decision brief and clarification list | Do we know the audience, purpose, inputs, outputs, and unknowns |
| 2 Scene and geometry | Grey model or model audit | Are scale, room envelope, openings, joinery, and major assets correct |
| 3 Cameras and view plan | Low-detail camera studies | Do these views explain the room honestly and efficiently |
| 4 FF&E and materials | Furnished material draft | Are products, finishes, texture scale, and combinations right |
| 5 Lighting and atmosphere | Lighting studies | Does the mood suit the design, use, location, and campaign |
| 6 Review and correction | Consolidated draft rounds | Are comments clear, complete, and tied to the agreed scope |
| 7 Final rendering and delivery | Approved files and archive | Are resolution, crops, colour treatment, naming, and rights correct |
The Realistic 3D FAQ describes the wider production sequence as brief, modelling, materials, lighting, camera composition, review, revisions, and delivery. The workflow below shows how to make those stages useful for interior teams.
What should the brief decide before production begins?
The brief should decide who must act after seeing the image, what decision they need to make, which information governs the scene, how many outputs are required, and what quality level is appropriate. A room name and moodboard are not a complete brief.
Start with one sentence that links the visual to an outcome. The image must help the hotel operator approve the reception material palette. The image must help off-plan buyers understand the apartment living space. The image must help the design team compare two ceiling and lighting options.
Then define deliverables.
- Room or zone names
- Number and type of views
- Still, panorama, animation, or interactive output
- Horizontal, portrait, square, and campaign crop needs
- Screen, web, social, press, or large-format print use
- Required pixel dimensions and file format
- Primary audience and presentation date
- Design stage and source issue date
- Exact, indicative, and excluded content
- Reviewers and approval owner
- Included revision rounds
- Image usage rights and confidentiality
3D interior visualization services should quote against those facts. A request for three beautiful living-room images leaves too much open to interpretation.
Which files should a client send?
A client should send current plans, elevations, sections, reflected ceiling information, joinery details, schedules, FF&E references, material data, lighting intent, and clear notes about what is approved or still changing. More files do not automatically create a better brief unless their status is clear.
| Input | Useful content to include |
|---|---|
| Plans | Dimensions, levels, walls, openings, fixed furniture, loose furniture, and room names |
| Elevations and sections | Ceiling heights, joinery, wall treatments, reveals, bulkheads, and vertical relationships |
| Ceiling and lighting plan | Fixture locations, types, circuits or scenes when relevant, and ceiling features |
| BIM or 3D model | Native or exchange file, links, coordinates when needed, issue information, and known limitations |
| Joinery details | Profiles, panel breaks, handles, shadow gaps, equipment, and material transitions |
| FF&E schedule | Manufacturer, product code, dimensions, finish, supplier link, and approval status |
| Finish schedule | Location, product, colour, texture, pattern direction, joint or module size, and sample status |
| Moodboard | Labelled atmosphere, precedent, palette, and styling references |
| Lighting references | Time of day, daylight direction, luminaire data, colour temperature, and desired mood |
| Brand information | Logos, colour rules, artwork, signage, and retail or hospitality standards |
| Output brief | Cameras, crops, resolution, naming, deadline, reviewers, and usage |
Send PDFs for reliable visual reference even when native CAD or BIM files are included. Native data can contain links, families, layers, or view settings that do not transfer as expected. A marked PDF helps the studio verify what the author intended.
If only sketches exist, the studio can still create an early concept. Assumptions must be listed. The price and timeline should allow for interpretation and later design change.
For 3D rendering for interior design, teams should create a single source register. It can be a simple table with file name, revision, date, status, and note. That table is often more valuable than an unstructured folder containing many near-identical versions.
Reliable 3D rendering for interior design also needs one named reviewer who can resolve conflicts before they reach the studio.
How should files be audited before modelling?
Files should be audited for revision, scale, conflicts, missing information, transfer quality, and relevance to the required views before detailed modelling begins. The output should be a clarification list and an agreed assumption log.
Common conflicts include a plan that does not match the elevation, an old ceiling plan, generic BIM materials, furniture on the moodboard but not the FF&E schedule, a supplier link with several finish options, and a design model that lacks small but visually important profiles.
The audit should ask the following.
- Which file controls room dimensions
- Which ceiling height is current
- Which joinery detail is approved
- Which products must be exact
- Which assets may use a close visual substitute
- Which materials have physical samples
- Which light fixtures have usable product data
- Which external view is expected through the glazing
- Which adjacent rooms appear in mirrors or open sightlines
- Which design decisions are likely to change during production
Interior architectural rendering depends on this interpretation step. An imported model is not automatically a correct scene.
The buildingSMART IFC overview explains how IFC supports standardized digital descriptions and exchange in the built asset industry. Exchange still needs checking. Object names, materials, linked geometry, coordinates, and level of detail may not arrive in the form a visualizer needs. Interior architectural rendering therefore needs a visual audit after every important model transfer.
What happens during geometry and scene building?
During geometry and scene building, the studio cleans or rebuilds the room envelope, openings, ceilings, joinery, fixtures, furniture, and visible context at the level required by the approved views. The aim is not to model everything. It is to model the right things accurately enough for the intended decision and output.
The room shell controls trust. Wall thickness, ceiling height, window size, sill level, door opening, skirting, reveals, floor transitions, steps, and major service zones should follow the governing information.
During interior 3D visualization, the visualizer adds details that make materials behave believably. Perfectly sharp computer edges often look artificial, so small bevels can create realistic highlights. Fabric needs thickness and folds. Cushions need compression. Joinery needs panel gaps and shadow lines. Stone needs an appropriate slab or tile logic rather than one texture stretched across every surface.
3D interior rendering often starts with a grey model review. The surfaces have simple neutral shading so reviewers can concentrate on space, proportion, and camera position. This gate is cheap to change. It should happen before detailed material and lighting work.
A grey model also reveals missing geometry that a textured draft can hide. If the ceiling bulkhead is wrong, a beautiful light wash does not make it right.
How should cameras and views be selected?
Cameras should be selected to answer different questions about the room with the fewest useful images. Each view needs a subject, viewing height, lens choice, crop plan, and reason to exist.
Start with the room experience. Where does a person arrive. Which view explains circulation. Which angle proves the key joinery or material feature. Which view sells the emotional promise. Avoid ordering several angles that repeat the same information.
| View role | What it should reveal |
|---|---|
| Establishing view | Room volume, primary layout, main openings, and spatial hierarchy |
| Arrival view | First impression, orientation, and the intended reveal |
| Functional view | Kitchen work zone, desk, vanity, storage, seating, or circulation relationship |
| Material view | Joinery, stone, fabric, metal, artwork, or a signature detail |
| Connection view | Open-plan relationship or transition into an adjacent room |
| Campaign view | Strong composition, emotional focus, and flexible crop space |
Wide lenses can show more of a small room, but excessive width stretches edges and makes the space appear larger. A high camera can reveal furniture layout but feel detached from human experience. A low camera can create drama but hide worktops or circulation.
Interior 3D visualization should disclose when a view is intentionally illustrative rather than representative. An honest camera does not have to be dull. It must avoid creating the wrong impression of scale.
If an image must serve web banners, a property portal, social posts, and print, plan safe crop zones before final rendering. Cropping a finished image later may remove the focal point or distort the story.
How are FF&E and materials matched?
FF&E and materials are matched by connecting each visible item to a product reference, dimensions, finish, status, and source. Exact models are used where identity matters. Approved visual substitutes are used only when the required product data is missing or the item does not justify custom production.
Use a simple three-level rule.
| Match level | Meaning | Suitable use |
|---|---|---|
| Exact | Correct manufacturer, product, dimensions, form, and specified finish | Signature furniture, branded products, hero fixtures, and approval-critical items |
| Equivalent | Similar geometry and visual character, clearly approved as a substitute | Background assets and early design studies |
| Indicative | Provisional asset that communicates category or scale only | Concept work where selection is not made |
A moodboard is not enough to claim an exact match. It may show an inspiration sofa without dimensions or product identity. The FF&E schedule should name the selected item. The physical sample or manufacturer reference should control the finish.
Photorealistic interior visualization becomes credible when material response is built from more than colour. Roughness, reflection, surface relief, pattern scale, edge treatment, translucency, and variation all matter. Adobe explains that its physically based material system represents properties including roughness, translucency, coat, and sheen.
3D interior rendering also needs material mapping that follows construction logic. Timber grain should run in the designed direction. Tiles should use the intended module and joint width. Veined stone should be laid out with plausible slab continuity. Upholstery weave should not appear larger than the furniture.
How should day and dusk lighting be planned?
Day and dusk lighting should be treated as separate communication choices with agreed sun, sky, practical lights, exposure, and mood. One is not simply a darker version of the other.
A daytime scheme can reveal space, colour balance, window relationships, and material texture. A dusk scheme can emphasize practical luminaires, warmth, reflections, hospitality, and intimacy. Both should respect the physical room enough to remain believable.
The lighting brief should record location when relevant, orientation, approximate time, weather character, external context, curtain or blind position, intended luminaires, colour temperature references, and which practical lights are on.
Commercial interior visualization often needs layered lighting that reflects how the space is operated. Ambient, task, accent, decorative, and daylight sources may all contribute. The hierarchy should guide attention without making every surface equally bright.
The Autodesk interior rendering guidance notes that geographically referenced sunlight and manufacturer IES data can support interior rendering. Autodesk also explains that an IES file describes light intensity across a spherical grid.
Those inputs improve plausibility. They do not remove the need for specialist lighting design or validation when measured performance matters.
How should open-plan and multi-room projects stay consistent?
Open-plan and multi-room projects stay consistent when geometry, assets, materials, lighting logic, naming, and approvals are managed as one scene system rather than a collection of unrelated images. Every visible connection must agree across cameras.
An open kitchen, dining, and living area can appear in five images. A chair moved for one composition may suddenly disappear from the background of another. The stone scale may differ between cameras if materials are duplicated. Daylight direction may reverse if each room is lit separately.
Use one approved master scene where practical. Lock shared geometry and materials after review. Maintain an asset register, camera list, light-state list, and image status. If a change affects several views, update the shared source before rendering finals.
Interior 3D rendering for a development may also require consistency across unit types. A studio can establish a controlled kit of approved finishes, fixtures, appliances, doors, skirtings, sockets, artwork rules, and styling principles. Each room remains specific, but the campaign feels like one product.
For residential 3D visualization, this system is useful across kitchen, living, bedroom, and bathroom views. It protects the specification while allowing each room to have its own focal point.
How should reviews and revisions be controlled?
Reviews and revisions should be controlled through staged approvals, consolidated comments, named decision owners, and a clear distinction between correction and design change. Feedback should describe the required outcome and point to the governing source.
Use review rounds for different questions.
| Review gate | Review only these items |
|---|---|
| Grey model | Geometry, dimensions, openings, ceiling, joinery mass, major assets, and cameras |
| Material draft | Products, finishes, mapping, colour relationships, and styling |
| Lighting draft | Time of day, fixture state, brightness hierarchy, atmosphere, and reflections |
| Pre-final | Remaining corrections, crop, retouching, people, artwork, and output treatment |
| Final check | Resolution, naming, file format, colour profile, version, and delivery completeness |
One person should consolidate comments from the designer, developer, operator, marketing team, and client. Conflicting markups waste time and create accidental design decisions.
Use numbered cameras and dated files. Mark comments on the image. Cite the drawing, product, or sample when asking for a correction. Replace add warmth with a more useful instruction such as reduce the cool daylight effect on the wall while keeping the specified 3000 K pendants.
The studio should confirm whether a request is a correction, an included refinement, or a scope change. Replacing a wrongly modelled specified chair is a correction. Selecting an entirely new furniture scheme after approval is a design change.
3D interior visualization services should define revision terms before production. Unlimited revisions usually hide an uncontrolled approval process rather than offer real value.
What is delivered after final approval?
After final approval, the studio should deliver the agreed image files, formats, sizes, crops, colour profile, naming, and usage scope, plus any additional scene or source files included in the contract. The archive should make future updates possible without confusing draft and final versions.
Common still-image deliveries include high-resolution TIFF or PNG for print and post-production, optimized JPEG or WebP for web, and alternate crops for social or listings. Layered files may be useful when the client has an internal retouching team, but the layer structure and included passes should be agreed.
Animation needs a separate delivery plan for resolution, frame rate, duration, sound, titles, captions, codecs, aspect ratios, and thumbnail images. Interactive work needs hosting, browser, device, performance, control, analytics, and maintenance decisions.
The final package should record which image is approved and which specifications were represented. It should not imply that a later construction or product change appears in the image.
The Realistic 3D project gallery helps teams compare still-image quality and subject range. A portfolio is most useful when the buyer asks how its detail, lighting, and composition relate to the proposed project rather than choosing a studio from one dramatic image.
What makes an interior render realistic and accurate?
An interior render feels realistic when scale, geometry, materials, light, camera behaviour, styling, and image treatment support the same believable scene. It becomes accurate when those visual choices are tied to current project evidence and checked against the intended level of certainty.
Realism and accuracy overlap, but they are not identical. An invented hotel suite can look completely photographic. A design-accurate apartment can use a simplified concept style. One describes visual credibility. The other describes fidelity to project information.
The best interior 3D rendering balances both. It should feel convincing enough to communicate the experience and controlled enough to support the stated decision.
Why does correct scale matter more than decoration?
Correct scale matters more than decoration because viewers detect proportion errors even when they cannot name them. A room with the wrong ceiling height, oversized furniture, shallow worktop, wide doorway, or tiny texture pattern will feel false beneath any amount of styling.
Begin with the room envelope and human relationships. Check floor-to-ceiling height, sill level, door height, worktop level, seating height, circulation, fixture dimensions, and reach zones against the governing information. Check every branded item against manufacturer dimensions where its identity matters.
Then check small construction cues. Skirting thickness, shadow gaps, panel joints, grout width, socket scale, curtain clearance, door frames, reveals, and edge radii help the eye understand size. These details should appear where the camera can see them, not as indiscriminate model density.
Interior architectural rendering also needs visual consistency in repeated elements. If one downlight changes diameter between rooms or one door set has a different frame depth, the inconsistency can make the whole environment feel synthetic.
Before materials are approved, print or display a clay view with a few known dimensions. Ask whether the furniture could physically occupy the space and whether the chosen lens has stretched the room. That check is faster than correcting every final image.
How do physically based materials improve realism?
Physically based materials improve realism by describing how a surface interacts with light through coordinated properties rather than one flat colour. Base colour, roughness, reflection, metallic response, normal or bump detail, displacement, transmission, and other properties work together to distinguish timber, stone, glass, fabric, metal, paint, and plastic.
The goal is not to use every map. It is to represent the visible behaviour that matters at the image scale.
| Material property | What it changes visually | Common failure |
|---|---|---|
| Base colour | Surface colour without lighting and reflection baked in | Using a photograph with strong shadows as the colour source |
| Roughness | Sharp or broad reflection response | Making every material equally glossy |
| Normal or bump | Fine surface relief without changing the outline | Relief that is too deep or too large |
| Displacement | Actual or rendered surface depth and silhouette | Using heavy displacement where a subtle normal map is enough |
| Metallic response | How conductive surfaces reflect and colour light | Treating painted plastic as bare metal |
| Transmission | Light passing through glass or translucent material | Perfectly clear glass with no thickness or reflection |
| Coat or sheen | Layered finish or fabric-like grazing response | Applying a strong effect to every surface |
The Khronos PBR reference lists portable properties such as base colour, roughness, metallic response, normal detail, transmission, sheen, and clearcoat. The value of a consistent model is predictable material behaviour across lighting and delivery systems.
Texture scale is just as important. A timber image may be physically plausible but mapped at twice the real board width. A woven fabric may read as rope. A stone slab may repeat the same feature every metre. Photorealistic interior visualization depends on correcting those cues.
Material variation should remain restrained. Real painted walls are not perfectly uniform, but heavy grunge makes a new development look neglected. Real stone varies, but random contrast can contradict the approved slab selection. Reference the intended condition, age, maintenance, and camera distance.
How should finishes be represented without overpromising?
Finishes should be represented from approved product data, physical samples, measured dimensions, and controlled reference photography where available. The image should identify substitutes and avoid claiming that screen colour or simulated light is a guaranteed match to the installed finish.
Use an accuracy ledger for every visible decision-critical item.
| Status | Meaning | Required action |
|---|---|---|
| Specified | Correct product and finish reference is available | Match geometry and material response to the agreed evidence |
| Representative substitute | A similar asset or texture is used with approval | Record the difference and avoid exact-product claims |
| Artist selected | The studio chose the element to complete the composition | Obtain approval before final use |
| Unresolved | The design team has not made the decision | Use a clear provisional asset or exclude the view from approval claims |
This ledger is particularly valuable in interior 3D rendering for sales imagery. A campaign image may include optional furniture, upgraded worktops, decorative lighting, or a view beyond the window. If those elements affect the overall impression, labels and sales material should explain their status.
The US Federal Trade Commission truth in advertising guidance states that advertising must be truthful and not misleading. The UK Advertising Standards Authority guidance on imagery likewise explains that imagery contributes to the overall impression of an ad. A small disclaimer cannot reliably correct a central visual exaggeration.
The responsible approach is not to make every render visually plain. It is to ensure that optional, indicative, upgraded, or future content is presented in a way the intended audience can understand.
How does lighting create depth and atmosphere?
Lighting creates depth and atmosphere by revealing form, material response, focal hierarchy, and the relationship between daylight and practical sources. Believable lighting has a reason for every major highlight and shadow.
Begin with the intended experience. A kitchen review may need clear task surfaces and balanced daylight. A restaurant campaign may need warm pools of light, controlled contrast, and reflective depth. A workplace image may need an even base with accents that communicate zones and identity.
The physical scene controls the result. Window size, orientation, glazing, curtains, surface reflectance, ceiling height, fixture distribution, and neighbouring obstructions affect light. Exposure and post-production can shape the image, but they should not erase the underlying logic.
The CIE guide on interior lighting covers matters including illuminance, glare limitation, and colour quality across building types. Those are performance topics. A marketing render may represent the intended lighting appearance, but technical compliance requires the appropriate specialist calculations, criteria, and project inputs.
For realistic room rendering, inspect contact shadows beneath furniture, bounce light near coloured surfaces, window exposure, reflections in glass and metal, and the balance between visible luminaires and the light they produce. Fixtures should not glow like white cut-outs while the surrounding room remains unaffected.
Artificial lights also need a hierarchy. If every pendant, downlight, wall light, strip, and table lamp is equally bright, the image loses depth. The designer should identify the primary scene rather than asking the artist to switch on everything.
Why do camera and composition change perceived space?
Camera and composition change perceived space because lens angle, position, height, tilt, and crop determine how much of the room is visible and how near and far objects relate. A technically correct room can look misleading when the camera is careless.
Choose a camera that resembles a plausible human viewpoint unless the image has a clear diagrammatic or editorial purpose. Keep vertical lines controlled for most architectural views. Avoid placing the camera inside walls or furniture merely to show more floor area.
A wide field of view can help in a compact bathroom or bedroom, but edge stretching should be checked. Furniture near the frame edge may appear much larger. A narrow view can compress depth and create a more editorial composition, but it may hide circulation or make connected areas feel closer than they are.
Every camera should have one visual sentence. This view explains the open-plan relationship. This view proves the island and dining clearance. This view sells the stone, joinery, and pendant composition. If a camera cannot be described, it may be redundant.
A strong interior render also benefits from negative space. A frame packed with furniture, décor, people, and bright highlights gives the viewer nowhere to look. Composition should establish a primary subject, supporting elements, depth, and a calm path through the image.
How much styling makes a scene believable?
A believable scene needs enough styling to explain use, scale, audience, and atmosphere without obscuring the design. Styling should support the room story and project market, not function as unrelated decoration.
A family apartment might include practical dining settings, books, soft furnishings, and subtle signs of use. A luxury show residence may use fewer, more deliberate objects. A workplace should show technology, task settings, storage, and occupancy patterns that match the intended operation. A retail scene should protect product visibility and brand hierarchy.
People can add scale and life, but they also create questions about demographics, clothing, pose, motion, image rights, and authenticity. Use them when occupancy is part of the message. Do not place figures where they hide a design issue or create an implausible route.
Commercial interior visualization often needs a styling and population guide across a campaign. Without one, the restaurant looks busy in one image and empty in another, the artwork changes between views, and the brand colour competes with decorative props.
CGI interior design works best when styling is an approval layer. Lock the main design before filling the scene with small objects. Otherwise reviewers may comment on a vase while the camera or joinery still needs correction.
Why is colour management part of accuracy?
Colour management is part of accuracy because rendering calculations, editing software, monitors, browsers, print systems, and display devices interpret colour through different spaces and transforms. A consistent pipeline reduces surprises, but no file can make every uncalibrated screen or lighted print look identical.
The Blender colour management documentation explains that colour management supports physically accurate work and appearance across display devices. Its colour space guidance also notes that rendering and compositing are best performed in a scene-linear colour space.
The studio should know the intended output. A high-resolution print image may need a different proof process from a web gallery. The client should review critical images on a suitable display and check physical finish samples under the intended real lighting when specification approval matters.
Avoid editing a render to match one photograph without understanding its white balance, exposure, compression, and screen conditions. Match known material character and approved creative direction. Record the colour profile on delivery.
Interior 3D visualization is a powerful colour coordination tool. It is not a spectrophotometer, a print proof, or a substitute for sample approval. Used well, interior 3D visualization helps the team compare relationships before checking the final choice against physical evidence.
What is the difference between a day scene and a lighting study?
A day scene is a visual representation of a chosen daylight condition, while a lighting study is an analysis produced with defined inputs, methods, and performance criteria. A render can use location, orientation, date, time, and luminaire data, but its purpose and validation level must be stated.
A campaign image may prioritize atmosphere and balanced visibility. It may use exposure choices, added fill, and retouching to communicate the room. A technical study may need accurate geometry, reflectance, sky model, obstruction, luminaire data, calculation grid, and reported metrics.
Do not label a visually plausible image as proof of daylight sufficiency, glare control, lux level, energy performance, or compliance. The same image can still help a designer understand where a room may feel bright, where a feature wall catches sun, or how a dusk scene changes the material hierarchy.
3D interior visualization services should ask whether the client wants a creative light state, a location-informed sun position, or a specialist calculation. The quote and review process differ.
How should realism be reviewed across five proof layers?
Realism should be reviewed across five proof layers that move from physical scale to specification, light, camera, and image treatment. This prevents a polished final from hiding an error in an earlier layer.
| Proof layer | Questions for review |
|---|---|
| Geometry | Are dimensions, openings, ceiling, joinery, fixtures, clearances, and visible context correct |
| Specification | Are exact products identified, substitutes approved, texture scale correct, and finish direction controlled |
| Lighting | Do source direction, fixture distribution, exposure, reflections, shadows, and atmosphere agree |
| Camera | Is the viewpoint plausible, lens controlled, verticals intentional, and room size represented fairly |
| Finish | Are retouching, people, styling, background, colour, crop, and sharpening consistent with the brief |
Review at full size and at the final use size. A high-resolution image may contain material errors that disappear on a phone. A strong desktop composition may become unreadable when cropped for a listing card.
Photorealistic interior visualization also needs multi-view checks. Confirm that assets, artwork, cushions, doors, curtains, reflections, external context, and light states stay consistent. Mirrors can expose missing geometry behind the camera. Glass can reveal a background that does not match the room orientation.
Use comparison overlays when revising an image. They make unintended changes easier to detect. Archive each approved gate so the team can identify when a discrepancy entered the process.
What common mistakes make interior renders look artificial?
The most common mistakes are incorrect scale, sharp edges, stretched textures, uniform gloss, repeated assets, weak contact shadows, unexplained lighting, excessive lens width, perfect symmetry, empty context, and aggressive post-production. They make the image feel generated rather than observed.
Watch for these warning signs.
- Timber grain changes direction without construction logic
- Stone veins repeat or cross joints implausibly
- Fabric looks like plastic because roughness and fold scale are wrong
- Glass disappears or reflects an impossible environment
- Every object is perfectly new, centred, and untouched
- Furniture floats because contact and weight cues are missing
- Window light is bright but casts no effect in the room
- Downlights glow while their beams and spill are absent
- Plants, books, and props repeat visibly
- The camera stretches objects at the frame edge
- Exterior views conflict between windows and mirrors
- Retouching removes natural shadow transitions and material variation
Realistic room rendering needs controlled imperfection, not random damage. A slight fabric compression, a subtle curtain fold, a small variation in timber, and a believable lived-in arrangement can help. Dirt and clutter are not automatic realism. Good realistic room rendering keeps every imperfection consistent with the intended age and use of the space.
The most expensive mistake is polishing the wrong design. Staged approval keeps effort aligned with certainty.
Realistic room rendering begins with the right room and specification before it becomes a polished image.
How do residential and commercial quality checks differ?
Residential quality checks focus on daily scale, comfort, storage, domestic lighting, tactile materials, and emotional familiarity. Commercial checks add operational flow, repeatable brand standards, public occupancy, wayfinding, durability, specialist lighting, and consistency across a larger asset set.
| Residential emphasis | Commercial emphasis |
|---|---|
| Human-scale furniture and circulation | Capacity, circulation, queuing, and operational zones |
| Kitchen, bathroom, and storage usability | Brand, signage, equipment, and repeatable standards |
| Daylight, view, privacy, and comfort | Layered lighting, customer route, and focal merchandising |
| Warmth, material tactility, and personal styling | Durability, maintenance character, and public-facing finish |
| Consistency across unit types | Consistency across locations, departments, or room categories |
Residential 3D visualization should avoid making a compact room feel oversized through a very wide lens or undersized furniture. It should also distinguish standard specification from optional upgrade packages.
Residential 3D visualization needs the same discipline in secondary rooms. A believable bedroom or bathroom should not become less accurate because the living room carries the campaign.
Commercial interior visualization should test how the brand appears across arrival, transaction, waiting, service, and exit views. It may need separate operational and campaign images because one composition cannot show every requirement well.
Both need evidence. The quality threshold should follow the image claim, not the project label.
What affects interior 3D rendering cost and studio selection?
Interior 3D rendering cost and timing depend on the work required to turn the source information into approved outputs. The largest drivers are model readiness, geometry and joinery complexity, custom FF&E, material matching, connected-room scope, camera count, light states, resolution, revisions, and deadline. Choose a studio by process and evidence as well as portfolio quality.
Published online price ranges vary widely because the products being compared are rarely equivalent. A basic image from a clean model and library assets is different from a campaign set with custom furniture, exact finishes, several connected rooms, staged approvals, large-format output, and broad usage rights.
Ask for a scope-based quote. A dependable proposal explains what is included, what information it assumes, which review gates apply, and what can change the price.
Which factors have the greatest effect on price?
The greatest price factors are source preparation, custom scene work, number of final views, asset accuracy, lighting variants, revision exposure, output requirements, and schedule pressure. Floor area matters only when it increases visible scope or complexity.
| Cost driver | Why it adds work | How to control it |
|---|---|---|
| Incomplete or conflicting files | Requires interpretation, rebuilding, and clarification | Issue one current source register before the quote |
| Detailed joinery and architecture | Adds visible modelling, profiles, hardware, and coordination | Identify hero details and required camera proximity |
| Custom FF&E | Requires exact modelling, texturing, and checking | Supply manufacturer data and prioritize critical items |
| Complex finishes | Needs accurate mapping, pattern, slab, weave, relief, and reflectance | Send product codes, samples, dimensions, and direction |
| Connected rooms | Expands shared geometry, sightlines, reflections, and consistency checks | Define visible boundaries for every camera |
| Additional views | Adds camera work, visible detailing, rendering, retouching, and QA | Use a view-coverage plan rather than ordering angles by guesswork |
| Lighting states | Adds setup, balancing, reflection changes, rendering, and review | Approve which day or evening states have distinct value |
| Revisions | Reopens approved layers and affects several outputs | Use gates and one consolidated reviewer |
| High resolution | Increases detail preparation, render time, retouching, and storage | Specify actual print or screen dimensions |
| Rush schedule | Requires reserved capacity and parallel review | Share the presentation date before commissioning |
Interior rendering services may price per final view, per room, per scene, per project phase, per animation second, or as a campaign package. Compare the deliverable and workflow, not only the unit label.
Shared scene work can make later views more efficient, but an extra view is never free. It may expose a new wall, adjacent room, custom asset, reflection, or exterior context that was not prepared for the first camera.
When commissioning 3D rendering for interior design, buyers should ask whether the quote covers one camera, one room scene, or every connected area visible in the final frame.
How many views does a room actually need?
Most rooms need only the views required to explain the overall concept, function, key transition, and important detail. A simple bedroom may need one or two images. A connected living, dining, and kitchen scene may need three to five. The final number should follow information coverage and campaign use.
Use the view coverage model.
| View type | Decision or story it covers |
|---|---|
| Hero view | Overall concept, volume, and emotional promise |
| Functional view | Layout, circulation, storage, work zone, or seating logic |
| Transition view | Relationship between connected rooms or arrival sequence |
| Detail view | Joinery, finish junction, furniture, lighting, or brand moment |
| Alternate-light view | A materially different day, dusk, or operating scene |
Do not order four similar corner views merely because four images fit the brochure. One strong establishing image and two distinct supporting views can explain more.
For commercial interior visualization, map outputs to touchpoints. A hospitality campaign may need arrival, reception, lounge, dining, guest room, and detail imagery. Each has a separate role. For a design review, fewer annotated views may be more useful.
The Realistic 3D gallery shows how stills and motion can cover different parts of a project story. A view plan should be agreed while low-detail previews remain inexpensive to change.
How long does the work take?
The work takes as long as the agreed scene, approval, and output complexity require. One defined room with complete inputs can move faster than several connected spaces with custom assets and many reviewers. Client decision time should be separated from studio production time.
Build the schedule around milestones rather than one final date.
| Schedule component | What happens |
|---|---|
| Intake and audit | Files are checked, questions logged, and scope confirmed |
| Geometry and cameras | Scene shell, main joinery, assets, and clay views are prepared |
| Specification | FF&E, finishes, materials, and styling are developed |
| Lighting | Day or evening states are tested and balanced |
| Review | Client comments are consolidated and returned |
| Final production | Approved scenes are rendered, retouched, checked, and delivered |
The studio can estimate its active production days. It cannot control how long a client committee takes to choose furniture or reconcile conflicting comments. Put review deadlines and approvers in the project plan.
3D interior rendering can also be phased. Approve one representative room or camera before applying the system to a large development. That pilot can settle material, styling, lighting, and image treatment while the cost of change remains low.
Urgency should not remove approval gates. It should reduce optional scope, confirm decision owners, and prioritize the outputs that protect the deadline.
Why do late revisions cost more?
Late revisions cost more because each approved layer supports later work. Moving a wall after final lighting can affect geometry, cameras, furniture, materials, light, reflections, rendering, and retouching across many images.
| Change stage | Typical effort | Example |
|---|---|---|
| Before geometry lock | Low | Correct a ceiling height in the grey model |
| Before camera lock | Low to medium | Change a view or crop while detail is limited |
| Before material lock | Medium | Replace a finish before final mapping and lighting |
| After lighting lock | Medium to high | Change furniture that affects shadows and reflection |
| After final rendering | High | Move joinery across several delivered views |
| After campaign adaptation | Very high | Repeat finals, crops, retouching, layouts, and exports |
Use a five-lock workflow for geometry, specification, cameras, lighting, and output. Approval does not mean no future change is possible. It means the team understands the downstream effect.
Interior 3D rendering proposals should define correction rounds separately from design changes. A studio error against an approved source should be corrected. A newly selected floor, revised ceiling, or different camera after approval changes the scope.
This distinction protects both sides. Clients know what they are buying. Studios can plan capacity and give realistic deadlines.
What should a professional quote include?
A professional quote should include the rooms, visible scope, output count, resolution, cameras, light states, custom assets, input assumptions, review gates, revision terms, schedule, rights, archive policy, exclusions, and price. It should make comparison possible before production begins.
Check for the following.
- Named project and room list
- Number of final stills or duration of motion
- Included draft and approval stages
- Exact or representative FF&E expectations
- Daylight and artificial-light scope
- Image dimensions, formats, and crops
- Included revision rounds and response times
- Client review deadlines
- Rush or out-of-scope rates
- Image usage and portfolio rights
- Source-file ownership or availability
- Confidentiality and data handling
- Cancellation and pause terms
- Archive period and future-update basis
3D interior visualization services should also state whether external context, people, custom artwork, branding, styling, and post-production are included. These items can materially change effort and image rights.
Avoid proposals built around an unexplained per-image number. Two studios may quote the same amount while one includes custom asset creation and staged reviews and the other assumes a clean supplied scene.
How should a studio be evaluated?
A studio should be evaluated on relevant portfolio quality, technical intake, interpretation, project control, material and lighting skill, communication, revision governance, rights, confidentiality, and delivery reliability. A beautiful portfolio is necessary, but it does not show how the team handles incomplete files or changing decisions.
Use a scorecard.
| Criterion | Strong evidence |
|---|---|
| Relevant work | Comparable residential, hospitality, retail, workplace, or development examples |
| Technical reading | Specific questions about drawings, ceiling, joinery, FF&E, finishes, and source status |
| Camera process | Numbered low-detail views approved before expensive production |
| Material control | Examples with correct scale, mapping, reflection, and product identity |
| Lighting control | Day and artificial-light studies with a clear evidence boundary |
| Project management | Named lead, schedule, review gates, version control, and consolidated feedback process |
| Transparency | Clear assumptions, substitutions, exclusions, revisions, and rights |
| Output planning | Knowledge of print, web, social, listing, animation, and interactive needs |
| Continuity | Ability to maintain shared scenes and assets across many rooms and phases |
| Trust | Secure file handling, confidentiality terms, references, and accountable communication |
Ask a prospective studio to explain one image. What source information did it receive. Which products were custom. How were cameras approved. What changed during review. What was illustrative. A thoughtful answer reveals more than a list of software.
The Realistic 3D studio profile provides context on the team and its wider visualization work. Buyers should still match the proposed team and workflow to the actual project.
Should a team render in-house or outsource?
A team should render in-house when it has recurring demand, skilled staff, suitable hardware, asset systems, and enough protected time to maintain quality. Outsourcing is useful when specialist realism, scalable capacity, campaign output, or an external production process is more valuable than owning every tool.
| In-house may fit when | Outsourcing may fit when |
|---|---|
| Daily design iteration is central to the service | Peaks in demand would disrupt the design team |
| Staff already have strong visualization expertise | The project needs specialist lighting, assets, or campaign polish |
| The firm can maintain software, hardware, libraries, and training | A defined external review process can protect designer time |
| Most outputs are quick internal studies | Final images need large-format, animation, or multi-channel delivery |
| Confidentiality requires tightly controlled internal access | A provider can meet agreed security and confidentiality terms |
A hybrid model is common. Designers create real-time or sketch views for daily iteration. A specialist studio produces final stills, motion, panoramas, or large campaign sets from controlled information.
The decision should include total capacity, not only software cost. Time spent preparing assets, fixing materials, managing render queues, retouching, checking files, and meeting campaign deadlines is part of production.
3D interior visualization services add the most value when their process complements the design team instead of creating a separate interpretation silo.
What red flags should a buyer avoid?
Buyers should avoid unqualified promises of exactness, fixed turnaround without a file review, vague revision terms, hidden substitutions, no camera approval, inconsistent portfolios, unclear rights, and pricing that omits the visible scope. These signals create risk even when sample images look strong.
Other warning signs include the following.
- The studio does not ask what the image must help decide
- Every project is promised the same schedule
- The quote does not name rooms or final views
- The workflow jumps straight to a polished draft
- Product identity is treated as optional after the client requested exact FF&E
- Artificial intelligence is used to alter specified elements without review
- Daylight, lighting performance, or construction accuracy is claimed without suitable evidence
- Files are exchanged without version or approval control
- The studio cannot explain image usage rights
- The portfolio contains many styles but no multi-view consistency
- Feedback arrives through unnumbered chat messages with no approval record
Interior rendering services should reduce ambiguity. If the sales process creates more ambiguity than it resolves, production is unlikely to improve it.
Which deliverables and rights should be agreed?
Agree final file types, pixel dimensions, aspect ratios, crops, colour profile, layered output, motion specifications, source-file terms, usage territory, duration, exclusivity, portfolio permission, and archive period before production. Ownership of final images does not automatically include editable scene files or third-party assets.
Third-party models, fonts, music, stock people, artwork, textures, and software libraries may carry their own licences. The contract should explain what the client can publish, adapt, transfer, or resell.
For stills, ask whether the package includes web and print masters, transparent cut-outs, alternative crops, and retouching layers. For motion, confirm music, voice, captions, social edits, and raw frames. For interactive work, confirm hosting, updates, analytics, and the term of support.
Interior 3D rendering archives should preserve the final scene version, approved cameras, linked assets, source register, and delivered files. If the design changes six months later, that archive can save time. Its retention and update terms should be written.
The client should also control confidentiality. Unreleased developments, private residences, branded prototypes, and investor material should not appear in a public portfolio without permission.
How can final images earn more value after approval?
Final images earn more value when the scene and crops are planned for design approval, stakeholder presentations, web pages, property listings, brochures, social posts, press, sales suites, motion, and future variants. Reuse should be intentional rather than an afterthought.
Create an asset map before finals.
| Channel | Useful output decision |
|---|---|
| Website hero | Wide crop with safe text space and fast-loading derivative |
| Property listing | Clear room view that represents scale fairly |
| Brochure | High-resolution print master with controlled colour workflow |
| Social feed | Portrait and square crops with a strong central subject |
| Presentation | Full-frame image plus annotated review version |
| Press | Clean file, caption, project facts, credit, and usage permission |
| Animation | Shared geometry, materials, light states, and planned movement |
| Future option | Archived scene with named assets and approved cameras |
The architectural rendering service can support a coordinated exterior and interior campaign when a development needs one visual language. The residential architectural rendering guide covers the wider home context, while the commercial architectural rendering guide addresses multi-stakeholder development imagery. Residential 3D visualization gains value when those interior and exterior assets share one audience and specification story.
CGI interior design assets can also support animation and interactive work when the geometry, materials, lights, and licences were prepared for reuse. CGI interior design should be scoped as a system only when the project will actually use that continuity.
Measure value through useful outcomes. Track approval time, number of decision rounds, late specification changes, asset reuse, campaign coverage, page engagement, enquiry quality, and tested conversion improvements. Avoid claiming that rendering alone caused a sale unless the evidence supports that conclusion.
Photorealistic interior visualization is an asset system when the underlying scene, approvals, and rights are managed well. It is only one attractive file when they are not.
What do teams ask before commissioning interior 3D rendering?
Teams usually ask what the service includes, which files are required, how price and timing are set, whether exact FF&E can be matched, how many views to order, and what final files they will receive. The useful answer always depends on project stage, source quality, visible scope, and intended use.
What is interior 3D rendering?
Interior 3D rendering is the production of digital room images from three-dimensional geometry, materials, furniture, lighting, and virtual cameras. It helps people understand an unbuilt or unfinished interior before procurement, fit-out, staging, or marketing. The result may be a still, panorama, animation, 3D floor plan, or interactive experience.
Unlike a floor plan, it shows an eye-level experience. Unlike a moodboard, it combines selected elements inside a defined space. It remains a representation of the information supplied rather than proof of completed construction.
What files are needed for interior 3D rendering?
The most useful files are current plans, elevations, sections, ceiling and lighting information, joinery details, a BIM or 3D model when available, finish schedules, FF&E references, moodboards, and output requirements. Every file should include a revision or date and a note explaining whether it is approved, indicative, or superseded.
A project can start from sketches, but the studio must record more assumptions. Manufacturer links, product codes, dimensions, material samples, room orientation, desired time of day, and reference photography reduce interpretation. Send a marked PDF even when native CAD or BIM is supplied.
How much does interior 3D rendering cost?
Interior 3D rendering has no reliable universal price per image because scope varies. A quote should account for source preparation, geometry, joinery, custom FF&E, material accuracy, connected rooms, number of views, lighting variants, resolution, revision rounds, rights, and deadline. The best comparison is a like-for-like written scope from each studio.
Ask what is included before comparing totals. A low unit price may assume library furniture, one simple room, limited resolution, no custom assets, and a narrow revision policy. A larger campaign may reuse shared scene work and still require separate effort for every final view.
How long does an interior render take?
An interior render can take several working days or longer depending on complexity, source readiness, custom assets, view count, lighting states, review speed, and required quality. A studio should estimate milestones after auditing the files rather than promise one timetable for every room.
Separate active production from client review. A complete one-room brief can move quickly. Several connected spaces with new joinery, exact furniture, many stakeholders, and day and evening variants need more time. Lock geometry and cameras early to protect the delivery date.
Can a render match an exact moodboard and FF&E schedule?
A render can closely represent an approved moodboard and FF&E schedule when exact products, dimensions, finishes, manufacturer data, texture references, and physical samples are available. It should not claim an exact match where the moodboard is inspirational, a product model is unavailable, or screen colour is the only reference.
Label each item as specified, a representative substitute, artist selected, or unresolved. The client should approve substitutes before final rendering. Physical samples and product specifications remain the authority for procurement and finish approval.
How many camera views does each room need?
Each room needs enough views to cover the overall concept, functional layout, key transition, and important detail without repetition. A simple room may need one or two images. A connected kitchen, living, and dining area often needs three to five distinct views. Campaign crops can affect the final count.
Approve numbered clay cameras before detailed work. Give every image a job such as hero, functional, transition, detail, or alternate light. If two cameras tell the same story, keep the stronger composition and spend the budget where new information appears.
Can one project include daylight and evening views?
One project can include daylight and evening views when both states support a real design, approval, or marketing need. Each state requires its own sun or sky, practical-light setup, exposure, reflections, atmosphere, rendering, review, and final treatment. An evening image requires rebuilding, not simple darkening.
Agree which fixtures are on, the intended time and mood, external visibility, curtain position, and whether the view is creative or location informed. If lighting performance must be verified, commission the appropriate specialist analysis separately.
What formats and resolutions should a rendering studio deliver?
A rendering studio should deliver formats and resolutions based on final use. Web may need optimized JPEG, WebP, or AVIF derivatives. Print may need a high-resolution TIFF, PNG, or JPEG master with an agreed colour profile. Social, property portals, presentations, and banners may need separate aspect ratios and safe crops.
Specify pixel dimensions rather than asking only for 4K or print quality. Also agree file names, transparent backgrounds, layered files, retouching passes, source-scene terms, image rights, and archive duration. For motion, add resolution, frame rate, codec, sound, captions, and platform edits.
What should you take away about interior 3D rendering?
The key takeaway is that interior 3D rendering delivers better results when it is managed as a controlled design and communication process. Define the decision, issue current source files, mark certainty, approve geometry, specification, cameras, and lighting in order, then deliver each image for a known channel and audience.
Photorealism attracts attention. Evidence builds trust. A strong image does both without pretending to replace drawings, samples, specialist analysis, or completed-site verification.
Use the SPACE check before approval. Confirm scale and structure, products and finishes, atmosphere and light, camera and composition, then evidence and approval. That five-part review catches the errors that visual polish can hide.
When the room, audience, files, and output needs are clear, contact Realistic 3D to plan an interior scene that can support design review, stakeholder approval, and responsible marketing from one controlled visual base.
