

Three weeks before a product launch, the packaging team changes the cap. The retail partner asks for a square main image. Paid media needs five colourways, and the prototype is still with the manufacturer. A new photoshoot would require another sample, another shipment, and another booking.
3D product rendering gives the team another route. It turns an accurate digital model into finished product images or motion assets by adding materials, lighting, cameras, and post-production. Brands use it to market products before manufacture, keep every variant consistent, and build channel-ready visuals without photographing each version separately.
The useful asset extends beyond the final image. The approved master model behind it can support ecommerce packshots, colour variants, lifestyle scenes, cutaway views, animation, and interactive 3D. That changes the economics of a campaign because later assets reuse approved geometry and materials.
This guide explains the workflow, the real quality checks, the cost drivers, and the decisions a brand should make before hiring 3D product rendering services.
What is 3D product rendering and what can brands create with it?
3D product rendering is the creation of a finished two-dimensional image or animation from a three-dimensional product model. The artist prepares the geometry, recreates the surface properties, sets the light and camera, calculates the image, and completes any required compositing. The output can look photographic, technical, stylised, or deliberately conceptual.
The process is useful because the digital product can be viewed from any approved angle. It can also be placed in a studio, a room, an outdoor scene, or an abstract campaign environment. Nothing needs to be physically rebuilt when the camera moves.
Search language can make the service sound more confusing than it is. Buyers may ask for realistic 3D product rendering services, product design rendering, or a product rendering service. A clear brief separates four things. It identifies the model, the scene, the final outputs, and the reusable source files.
How are 3D modeling, rendering, and product visualization different?
3D modeling creates the digital object. Rendering calculates an image from that object. Product visualization is the wider commercial discipline that uses models, still images, animation, augmented reality, and interactive viewers to explain or sell a product.
| Term | What it produces | Why a brand needs it |
|---|---|---|
| 3D modeling | Digital geometry with scale, components, and surface structure | It creates the reusable product asset |
| 3D rendering | A calculated still image or frame sequence | It creates campaign and ecommerce visuals |
| 3D product visualization | A system of still, motion, and interactive outputs | It supports the product across its full sales journey |
This distinction matters when comparing quotes. 3D product modeling and rendering may be priced together when no usable model exists. If clean CAD is already available, the studio may only need data preparation, materials, lighting, camera work, and final rendering. A low quote that excludes modeling can look expensive later when cleanup becomes a separate charge.
3D rendering for product design serves a different purpose from a finished campaign image. Early design visuals help teams compare form, proportion, colour, and finish. Final marketing work needs tighter material matching, label accuracy, controlled reflections, retouching, and output specifications for each channel.
What makes a 3D product render look photorealistic?
A photorealistic render looks convincing when the model behaves like a real object under a real camera. Software can calculate light accurately, but it cannot repair wrong proportions, razor-sharp manufactured edges, flat materials, or a camera angle that makes the product feel distorted.
The strongest realism checks are practical.
- The silhouette matches approved drawings or the physical product
- Small edge radii catch highlights at the correct scale
- Surface normals remain clean across curves and panel transitions
- Texture scale matches the real grain, weave, brushing, or mould pattern
- Roughness controls how broad or sharp a reflection appears
- Transparent materials use credible thickness and refraction
- The focal length preserves believable product proportions
- Controlled imperfections stop every surface from looking computer-perfect
Materials need more than a colour value. Painted metal, anodised aluminium, frosted glass, clear plastic, leather, and coated paper can share a similar base colour while reacting very differently to light. Adobe guidance on physically based materials identifies properties such as roughness, metallic response, translucency, coat, and sheen. Those properties are why the same grey can read as plastic in one render and powder-coated steel in another.
Realistic product rendering also depends on references. Colour-critical teams should provide approved samples, measured colour values, finish codes, and controlled photographs. Even then, an uncalibrated phone or office monitor can shift the final appearance. The review process should assess colour on known displays and compare the render with an approved reference under agreed conditions.
The best realistic 3D product rendering services show close crops as well as dramatic hero shots. A watch bezel, cosmetic pump, fabric seam, moulded button, or label edge exposes weak geometry and weak materials quickly. High-quality 3D product renderings stay convincing at the details a buyer will inspect.
What can one approved 3D product model produce?
One approved master model can produce six core brand assets. The model still needs a suitable scene and output setup for each use, but the geometry, proportions, and material decisions do not need to restart every time.
| Output | Best use | What changes from the master asset |
|---|---|---|
| Ecommerce packshots | Product pages and marketplaces | Camera, clean background, crop, and channel rules |
| Colour and finish variants | Configurable products and large catalogues | Approved material values, labels, or component options |
| Lifestyle scenes | Campaigns and product education | Environment, props, lighting, and art direction |
| Exploded or cutaway views | Technical sales and product explanation | Component separation, internal geometry, and annotation space |
| Product animation | Launch films, paid media, and sales screens | Rigging, motion, timing, sound, and frame delivery |
| AR or interactive assets | Product pages and in-room viewing | Lower polygon count, compressed textures, and real-time materials |
This is the one model to six outputs framework. It is a planning model, not a claim that one file can be uploaded everywhere without preparation. A high-resolution production model may be too heavy for a browser. An animation rig may need clean component hierarchy. An AR asset often needs reduced geometry and simplified material features.
The Khronos glTF standard was designed for efficient transmission and loading of 3D scenes and models. It is widely used for real-time delivery. Apple uses USDZ for AR Quick Look, which lets users view supported objects in their surroundings through Apple devices. A capable studio plans these derivatives when the master model is built instead of treating them as an afterthought.
Brands considering motion can review product motion and animation examples and the scope of 3D animation services. The strongest motion briefs explain a product feature, assembly, mechanism, or benefit. A turntable alone is useful, but it does not automatically tell a product story.
Which product categories benefit most from rendering?
Products benefit most when they have many variants, a long visual life, hard-to-photograph details, or a launch schedule that starts before final samples exist. Hard-surface products are usually the simplest candidates. Soft, organic, reflective, transparent, and highly irregular products need more specialised work.
| Product category | Strong rendering use | Common technical challenge |
|---|---|---|
| Furniture and lighting | Lifestyle scenes, finish variants, and in-room AR | Fabric behaviour, wood variation, scale, and soft furnishings |
| Consumer electronics | Launch visuals, colourways, and feature animation | Tight seams, coatings, screens, and brand colour accuracy |
| Appliances | Ecommerce sets, kitchen scenes, and cutaways | Mixed metals, plastics, glass, and large assemblies |
| Packaging and beauty | Campaign heroes, label variants, and retail visuals | Fine typography, clear plastics, liquids, foil, and coatings |
| Jewellery and watches | Macro imagery and material variants | Gem optics, polished surfaces, micro detail, and fingerprints |
| Industrial equipment | Exploded views, assembly motion, and sales decks | Complex CAD, internal parts, and technical accuracy |
| Configurable products | Variant libraries and product configurators | Option logic, naming, and asset governance |
| Products still in development | Design review and pre-launch marketing | Changing specifications and incomplete references |
Furniture, lighting, and appliances can also benefit from lifestyle interior rendering when the room is part of the buying decision. The product must remain the hero. An elaborate environment that hides scale, access, or key details weakens the image.
3D product design rendering is especially useful before tooling because it reveals visual issues while changes are still relatively cheap. It does not replace engineering validation. Product design rendering shows the proposed appearance. It does not prove strength, safety, manufacturability, or regulatory compliance.
How does the 3D product rendering process work?
The process moves from an agreed brief to source-file review, model preparation, geometry approval, material development, lighting and camera work, draft review, final rendering, and delivery. Strong 3D product rendering keeps irreversible work late and cheap decisions early. That is why approvals are split into gates instead of waiting for one polished final image.
At Realistic 3D, the practical starting point is the same whether a client needs one still or a larger visual system. Define what the product must communicate, where each asset will appear, and what information is approved. The 3D product rendering services page shows the main output types, including studio renders, lifestyle scenes, colour options, cutaways, and campaign images.
What should a brand decide before production starts?
A brand should approve the deliverable map before modeling or scene work begins. The studio needs to know the target channels, aspect ratios, crop safety, image count, camera angles, variants, backgrounds, output sizes, deadline, and review contacts.
Start with the business job of each visual. A marketplace main image must explain the product quickly and follow channel rules. A launch hero image can use more art direction. An exploded view needs space for labels. A social crop needs important details away from interface overlays.
The brief should answer these questions.
- Which product or SKU is being rendered?
- Which version of the design is approved?
- What must the viewer understand in each image?
- Which channels will use the assets?
- Which colours, finishes, labels, and accessories are included?
- Which views and crops are required?
- Who approves geometry, materials, and brand presentation?
- What can still change before launch?
This early work is part of 3D rendering for product design when the design is still moving. It becomes production planning once the visual specification is locked. Mixing the two without a change process creates repeated revisions.
What files and references does a rendering studio need?
The best input is an approved 3D model or manufacturing CAD plus visual references for every visible material and finish. A studio can also work from dimensioned drawings, sketches, photographs, and a physical sample, but missing information increases interpretation and review time.
Use this input checklist.
- Native CAD or neutral CAD such as STEP or IGES
- Mesh files such as FBX, OBJ, or GLB when CAD is unavailable
- Dimensioned drawings and critical measurements
- Front, back, side, top, bottom, and detail photographs
- Material and colour specifications with finish codes
- Artwork files for labels, screens, packaging, and logos
- Approved variant list and component combinations
- Brand guidelines and campaign references
- Shot list with aspect ratios, resolutions, and safe crop areas
- Marketplace or advertising specifications
- Deadline, review dates, and named approvers
Manufacturing CAD is accurate, but it is rarely ready for a final image. It may contain hidden engineering parts, duplicate bodies, extremely small features, naming problems, unsupported procedural data, or no surface information. Tessellation can introduce faceting. Imported normals can break reflections. These issues are normal cleanup tasks in 3D product modeling and rendering.
If no CAD exists, the studio builds the product from measurements and reference views. This approach can work well for furniture, packaging, accessories, and simple consumer products. The brand should identify which dimensions are exact and which details are artistic interpretation. A physically shipped sample can resolve shapes and materials that flat photographs do not show.
The current Realistic 3D FAQ explains the wider project process, files, revisions, pricing, and timelines. A product brief should still record its own scope because product complexity varies far more than a generic FAQ can capture.
How is CAD turned into a render-ready product model?
CAD preparation begins with an audit. The artist checks scale, units, part hierarchy, missing components, surface continuity, tiny features, and whether the chosen file opens correctly. The geometry is then tessellated or converted into a mesh that the rendering software can use.
Cleanup focuses on what affects the image.
- Remove hidden manufacturing detail that adds weight without changing visible form
- Repair gaps, overlapping surfaces, flipped normals, and shading errors
- Preserve critical seams, joints, controls, vents, fasteners, and edge radii
- Create clean UV coordinates where printed or textured detail must sit precisely
- Separate moving parts and material zones with clear names
- Add controlled subdivision or extra detail only where the camera can see it
Edge treatment deserves attention. Real manufactured edges have a radius, even when a drawing looks sharp. A small bevel catches a highlight and tells the eye how large the object is. A product with perfect mathematical corners often looks like a basic computer model.
3D product design rendering may also require a presentation model that differs from engineering data. Flexible cables, stitched fabric, liquid, soft seals, food, or an open package may need artistic geometry because manufacturing CAD does not describe their final resting shape.
Why should geometry be approved before materials?
Geometry should be approved first because proportion changes can invalidate camera work, UV layouts, labels, and material masks. A clay or neutral-grey draft makes the silhouette, seams, edge treatment, and component placement easy to inspect without polished lighting hiding the problem.
The geometry approval should confirm four areas.
| Check | What the reviewer verifies |
|---|---|
| Scale and proportion | Overall dimensions and the relationship between parts |
| Silhouette | The product reads correctly from all required views |
| Assembly detail | Seams, gaps, fasteners, openings, and moving parts match the design |
| Variant logic | Optional components and configurations combine correctly |
This gate is where engineers or product designers should be involved. Marketing can approve visual emphasis later. A single named approver should resolve conflicting feedback before it reaches the studio.
Late geometry changes are expensive because they move through every downstream stage. A reliable product rendering service states what counts as a revision and what counts as a design change. That wording protects both the budget and the launch schedule.
How are materials matched to a real product?
Materials are matched by recreating how a surface responds to light, not by sampling one colour from a photograph. The artist studies base colour, roughness, reflection, transmission, coating, texture scale, micro detail, and visible wear. Lighting is then used to test whether the material behaves correctly across bright and dark reflections.
Physically based rendering gives artists a consistent model for this work. Khronos guidance on PBR explains how standard material parameters simulate lighting interactions and surface properties. That consistency is useful when a product moves from high-end stills to a real-time viewer.
Some materials expose errors faster than others.
- Brushed metal needs a correct grain direction and anisotropic reflection
- Clear plastic needs thickness, refraction, and believable moulded edges
- Frosted glass needs transmission without losing the product silhouette
- Coated paper needs subtle fibre, roughness, embossing, or foil response
- Fabric needs weave scale, fibre breakup, folds, and seam construction
- Gloss black needs clean reflections without becoming a featureless mirror
Photorealistic 3D product rendering often improves when the studio receives a physical swatch or sample. Photographs alone combine the material, the light, the camera profile, and the surrounding reflections. A sample lets the artist separate those factors.
Colour management remains part of approval. A product can match an approved colour value in the working space and still look different on an unmanaged display. The delivery note should state the intended colour space and the limits of screen reproduction. Realistic product rendering aims for controlled consistency, not a promise that every device will display an identical colour.
How are lighting and cameras chosen?
Lighting and camera choices are selected to explain the product, support the brand, and fit the channel. A clean packshot usually needs broad sources that define form and material without dramatic shadows. A campaign image can use stronger contrast, colour, and atmosphere.
The reflection is often the real design tool. A white strip reflected across a bottle can reveal curvature. A wide soft source can show a satin finish. A smaller source creates a sharper highlight that suits polished metal. Adding more lights does not fix a weak setup. Each source should have a job.
Camera choices affect trust. A very wide lens exaggerates the nearest parts. A long lens flattens depth. The working focal length, distance, and camera height should keep the product recognisable while meeting composition needs. Product design rendering may use a more neutral view for evaluation, while campaign work can use a more expressive angle.
Before final production, approve a low-resolution composition draft. It should show the camera, product position, lighting direction, background, crop, and major props. This stage is fast to change. Final-resolution rendering and detailed retouching should begin only after it is accepted.
How should drafts and revisions be approved?
Drafts should be approved in separate gates so each reviewer evaluates the right problem at the right time. A clear review chain is more valuable than a large revision allowance because it prevents approved decisions from reopening later.
Use five approval gates.
- Geometry and proportions
- Camera and composition
- Materials, labels, and colours
- Lighting and environment
- Final polish and delivery output
Feedback should be visual and specific. Mark the exact area, state the expected result, and attach the governing reference. Replace comments such as make it more premium with instructions about highlight shape, background value, material roughness, crop, or brand reference.
High-quality 3D product renderings also need a technical QA pass. Check spelling, artwork alignment, serial details, product orientation, component states, contact shadows, reflection errors, dust or retouch marks, edge halos, transparency, crop safety, and output dimensions.
What files should the brand receive at the end?
The brand should receive files matched to the planned channels, plus a written record of what is archived for future reuse. The contract should state whether the editable master model, textures, scene files, and working files are included or retained by the studio.
| File or format | Common use |
|---|---|
| JPEG | Ecommerce, marketplaces, email, and general web use |
| PNG | Transparent-background product assets |
| TIFF | High-resolution print and retouching workflows |
| PSD | Layered compositing when agreed in scope |
| EXR | High-dynamic-range passes for advanced post-production |
| MP4 or MOV | Product animation and paid media |
| GLB | Browser-based 3D and many Android workflows |
| USDZ | Apple AR Quick Look and supported Apple experiences |
Shopify product media guidance supports GLB and USDZ for 3D models. It also notes that files larger than 15 MB are optimized automatically. A studio should still deliver a lean asset. Automatic optimization is not a substitute for deliberate polygon, texture, and material decisions.
Google also supports linking a purchasable product page to a glTF or GLB file through Product markup with the subjectOf property and the 3DModel type. The Google merchant listing documentation applies this feature to pages where a shopper can buy a specific product. It does not turn a general blog article into a product listing.
For interactive work, AR product visualization requires a separate real-time brief. Ask for target devices, loading budget, viewing scale, material limits, fallback images, and browser testing. The source model can be shared, but the final real-time asset has its own QA.
When should brands choose 3D product rendering instead of photography?
Brands should favour rendering when the product does not yet exist, the catalogue has many variants, exact camera consistency matters, or one digital asset must serve several campaigns. Photography is often better when the sale depends on real human use, natural variation, tactile evidence, or a simple finished product that is ready to shoot. A hybrid workflow is frequently the strongest choice.
The decision should follow the product and the operating model. Creative preference comes later.
When does rendering have a clear advantage?
Rendering has a clear advantage when a physical shoot creates repeated operational work. A master model makes new views and approved variants incremental tasks instead of separate productions.
Choose 3D product rendering when several of these conditions apply.
- Final samples will arrive after marketing must begin
- The product has many colours, finishes, sizes, or regional labels
- Every SKU needs identical camera angles and lighting
- Internal parts or mechanisms must be explained
- The product is very large, very small, fragile, dangerous, or hard to transport
- Campaigns will need regular crops, scenes, and seasonal refreshes
- Animation, AR, or an interactive viewer is already on the roadmap
- Confidential product development limits access to prototypes
This is where 3D rendering for product design can flow into campaign production. The same approved geometry supports design decisions first and visual marketing later. The handoff works only when version control is clear. A render based on revision B should never be published after manufacturing moves to revision C.
Consistent product 3D rendering services also help global teams. Each market can request crops, labels, and environments while the core product remains controlled. The brand should maintain a variant matrix that records which components, colours, and claims belong together.
When is product photography still the better choice?
Photography is usually stronger when the physical truth of a specific item is the evidence. Food, people, handmade goods, natural stone, wood slabs, flowers, fashion fit, and products with unpredictable wear can lose credibility if CGI removes the variation buyers expect.
Photography also makes sense for a small one-off range that is finished, available, easy to transport, and unlikely to change. Building a detailed model for one simple shot may add unnecessary setup cost.
Human interaction is another reason. A hand gripping a tool, a jacket moving on a body, or steam rising from a meal carries small physical details that are costly to reproduce well. A real shoot may get there faster.
Realistic product rendering should never make the delivered item look materially better than it is. A wider cap, deeper texture, cleaner seam, brighter screen, or larger accessory can change a buyer expectation. In the United States, FTC truth-in-advertising guidance states that advertising must be truthful and not misleading. Other markets have their own rules. Brand and legal teams should review pre-production visuals when the final item is still changing.
How can rendering and photography work together?
A hybrid workflow combines the control of CGI with the physical evidence of photography. It is useful when part of the campaign needs a real person, real location, or real texture, while product variants and hard-to-shoot angles remain digital.
Common hybrid methods include these.
- Photograph talent and composite an accurately matched rendered product
- Photograph one approved hero SKU and render the remaining colourways
- Use a photographed surface or room with a rendered product placed into it
- Build the pre-launch campaign in CGI and shoot the final item later for validation
- Photograph unique natural materials and map them onto an accurate digital model
Hybrid work needs shared camera data, lighting direction, lens behaviour, colour management, and contact shadows. A technically strong composite can still fail if the rendered product is sharper, cleaner, or lit from a different direction than the photograph.
Photorealistic 3D product rendering is most convincing when it adopts the constraints of a real shoot. That includes plausible reflections, depth of field, lens response, and small surface variation. Photography can also benefit from CGI discipline through consistent shot lists, variant planning, and channel crops.
Is rendering cheaper than photography?
Rendering can be cheaper across a large or frequently changing asset library, but it is not automatically the lowest-cost option for one image. The model and material setup create an initial investment. The economic advantage appears when approved work is reused for more views, variants, regions, formats, and campaigns.
Use cost per approved reusable asset as the comparison.
Total visual production cost divided by the number of approved assets reused across channels gives a more useful figure than price per image. Include physical samples, shipping, studio hire, sets, travel, talent, retouching, reshoots, 3D modeling, rendering, internal review time, and future updates.
A 2025 Khronos case study on the Google Store 3D workflow reported that Google reduced the cost of developing product education materials by more than 50 percent and could launch product information up to four times faster. Those results belong to Google and should not be treated as a universal benchmark. The useful lesson is that a controlled model library can create operational value beyond one image.
3D product modeling and rendering becomes more economical when the master asset remains valid. A major redesign can remove that advantage. Brands should track model version, approval date, source drawings, materials, artwork, owner, and every campaign using the asset.
Where can brands reuse product renderings?
Brands can reuse an approved product model across the product lifecycle, from design review to retail and after-sales education. Each output still needs the right crop, resolution, file size, and art direction.
| Stage | Useful asset |
|---|---|
| Product development | Neutral design-review images and finish comparisons |
| Launch planning | Hero visuals, teaser crops, and short motion loops |
| Ecommerce | Packshots, detail views, variants, and 360 spins |
| Marketplaces | Rule-compliant main images and secondary explainers |
| Paid media | Lifestyle images, cutdowns, and product animation |
| Sales enablement | Exploded views, feature callouts, and technical visuals |
| Retail and exhibitions | Large-format graphics and screen loops |
| Customer experience | Interactive viewers and AR placement |
Marketplace rules must shape the render brief. Amazon product image guidance requires a pure white main-image background for many listings and restricts extra text, logos, borders, and watermarks. Google Merchant Center image guidance also sets image and content requirements that change over time. Recheck the current category and region rules before export.
Product 3D rendering services should deliver channel variants from an approved source scene. Stretching one finished JPEG into every ratio creates weak crops and inconsistent scale. Render for the crop or provide enough canvas and resolution for controlled adaptations.
How should brands budget, brief, and choose a rendering studio?
Brands should budget by scope, not by a generic image price. The responsible quote depends on model readiness, visible complexity, materials, views, variants, scenes, output formats, schedule, and revision risk. A clear brief lets realistic 3D product rendering services estimate those factors and shows whether a provider understands the work before production begins.
A simple studio still from clean approved CAD sits at the lowest end of the effort range. Custom modeling, complex transparent materials, detailed lifestyle environments, many options, animation, and compressed real-time assets require more work. A fixed public price cannot describe all of those briefs honestly.
What affects the cost of 3D product rendering services?
Cost rises with the amount of new information the studio must build, interpret, or revise. Final resolution matters, but it is rarely the main driver. Geometry and approval uncertainty usually have a larger effect.
| Cost driver | Lower-effort condition | Higher-effort condition |
|---|---|---|
| Source model | Clean, approved, well-organised CAD | No model, damaged mesh, or incomplete design |
| Product form | Simple hard-surface object | Soft goods, organic detail, liquids, or complex assemblies |
| Materials | A few well-documented finishes | Glass, gems, layered coatings, fabric, foil, or unclear samples |
| Views | One approved studio angle | Many unique cameras and detail shots |
| Variants | Simple colour changes | Different parts, artwork, accessories, and regional combinations |
| Environment | Clean background | Custom lifestyle set with props and storytelling |
| Motion | No animation | Rigging, simulation, mechanism, editing, and sound |
| Interactive use | Stills only | GLB, USDZ, optimization, browser testing, and AR scale checks |
| Review | One coordinated approver | Conflicting stakeholders or changing specifications |
| Schedule | Planned review dates | Rush production or late source changes |
The quote should separate the reusable setup from each output. That makes future work easier to price. It should also state whether a new crop uses the existing camera, whether a new colour needs material development, and whether a lifestyle scene can be reused.
Product design rendering and final campaign rendering may belong in separate phases. Early visuals can tolerate changing geometry. Final imagery needs approved artwork, precise materials, and complete output specifications. A quote that recognises both phases will be more reliable than one that assumes the design is already locked.
How long does a product rendering project take?
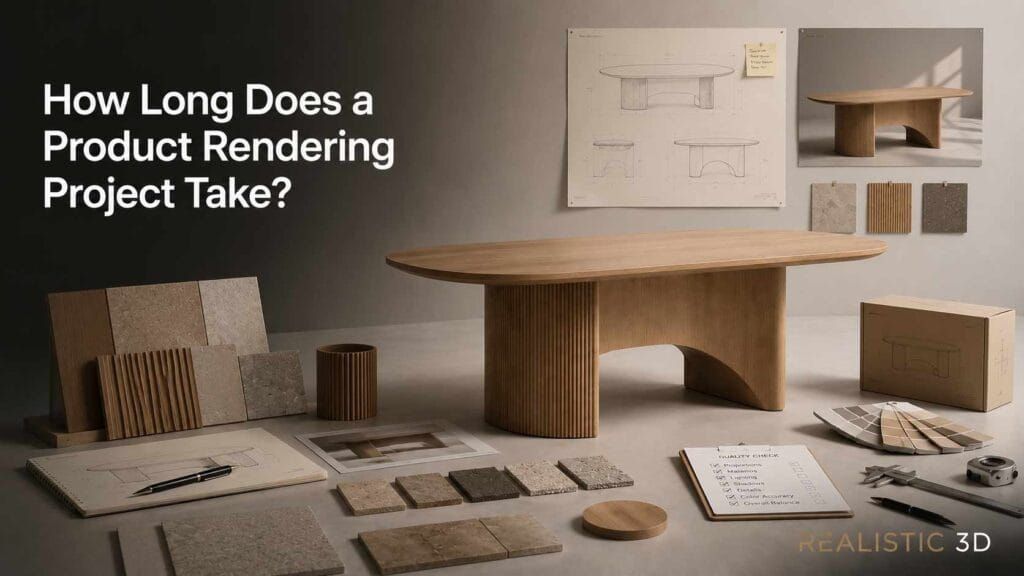
A straightforward still-image project with clean files may take several working days. A complex product, custom environment, large variant set, or animation can take several weeks. Review speed matters as much as render time, so the schedule should include client approval windows and the cost of late changes.
The term render time often causes confusion. The computer may calculate a frame in minutes or hours, but most production time sits elsewhere. Artists audit files, repair geometry, create materials, set cameras, build the scene, prepare drafts, process feedback, run final QA, and export each channel version.
These issues commonly extend the schedule.
- Missing dimensions or reference views
- Unapproved product revisions
- Labels that change after material approval
- Transparent, reflective, or soft materials with no physical reference
- A lifestyle scene that needs custom modeling
- Variant combinations that are not defined
- Feedback gathered from several reviewers at different times
- New output ratios added after final composition approval
3D product design rendering moves faster when the brand labels decisions as approved, provisional, or unknown. That lets the studio avoid polishing a part that is likely to change.
What should a professional quote include?
A professional quote should define the deliverables, process, rights, schedule, and assumptions in plain language. If any of those areas are missing, two quotes cannot be compared fairly.
Check for these items.
- Product and design revision covered by the quote
- Modeling and CAD cleanup included
- Number of stills, cameras, variants, and scenes
- Output dimensions, aspect ratios, colour space, and file formats
- Animation duration, frame rate, aspect ratio, and sound scope
- Interactive formats, loading target, and device testing where required
- Approval gates and named client responsibilities
- Included revisions and treatment of design changes
- Schedule with feedback deadlines
- Usage rights, source-file ownership, archive period, and confidentiality
- Cancellation, pause, and rush terms
- Taxes and any third-party costs
A product rendering service should also explain what it needs to estimate accurately. An instant price based only on image count may ignore the most expensive part of the job.
How can a better brief reduce cost and delays?
A better brief reduces interpretation. It gives the studio one approved source of truth and tells reviewers when each type of feedback is due. This prevents the team from debating geometry after final lighting or discovering a marketplace crop after delivery.
Use this one-page brief structure.
| Brief section | Information to include |
|---|---|
| Product | Name, SKU, design revision, dimensions, and market |
| Objective | What the visual must help a buyer understand or do |
| Inputs | CAD, drawings, samples, photographs, artwork, and finish specifications |
| Outputs | Views, variants, scenes, animation, AR, and source files |
| Channels | Product page, marketplace, paid media, print, retail, or sales deck |
| Specifications | Size, ratio, crop safety, background, colour space, and file type |
| Art direction | Camera references, mood, lighting, props, and brand rules |
| Accuracy | Details that must match and areas still under development |
| Review | Geometry, materials, composition, final QA, and named approvers |
| Schedule | Draft dates, feedback dates, launch date, and dependencies |
| Rights | Usage, editable files, archive, confidentiality, and future variants |
This structure works for 3D rendering for product design and for finished marketing assets. The emphasis changes, but the decisions remain visible.
How should a brand evaluate a product rendering studio?
A brand should judge a studio on accuracy, material skill, process discipline, and delivery knowledge. A dramatic portfolio image proves taste. It does not prove that the studio can hold dimensions, manage fifty variants, or deliver a lightweight GLB that works on a product page.
Review the work at full size. Look for believable edge highlights, consistent proportions across views, clean labels, credible contact shadows, and materials that respond correctly. The Realistic 3D product rendering portfolio provides still-image examples, while the broader 3D rendering gallery shows the range of visual work.
Ask these questions before appointment.
- Who checks the source model and what problems are reported before production?
- Which approval gates are included?
- How are physical materials and colour references matched?
- Can the same approved model support stills, animation, and real-time use?
- How are variants named, combined, and archived?
- Which output standards and marketplaces does the team support?
- Who owns the editable source model and textures?
- How does the studio protect unreleased product data?
- What happens when the product design changes after approval?
- Who manages feedback and quality assurance?
High-quality 3D product renderings should survive close review and repeated use. Ask to see a neutral model view, a material close-up, and several angles of the same product. Consistency is harder to fake than one polished hero image.
The final test is clarity. A studio should explain what is known, what it must build, what it needs from the brand, and where risk remains. A photorealistic 3D product rendering brief also needs approved physical or measured references for every colour-critical surface. If the project is ready for scoping, use the you can contact us with the CAD, shot list, variant list, target channels, and deadline attached.
What else do brands ask about 3D product rendering?
The most common questions concern cost, time, input files, realism, photography, variants, reuse, and ownership. Each answer below gives the practical position a brand can use when preparing a brief.
How much does 3D product rendering cost?
3D product rendering cost depends on model readiness, form complexity, materials, views, variants, environments, motion, output requirements, schedule, and revisions. A simple still from clean CAD costs less to produce than custom modeling, clear materials, a lifestyle scene, and ten product configurations. Ask for a scoped quote that separates reusable setup from individual deliverables.
Comparing price per image alone can be misleading. A higher initial model cost may support later variants and campaigns at lower incremental effort. A product rendering service should state what is reusable and what triggers a new fee.
How long does a 3D product render take?
A simple still with approved files may take several working days. A detailed product suite or animation may take several weeks. The reliable answer comes after the studio checks the model, materials, scene, variants, review chain, and deadline.
Fast feedback shortens the calendar. Late geometry or artwork changes extend it because approved materials, cameras, and crops may need to be updated. Product 3D rendering services should provide draft dates and client feedback deadlines in the schedule.
What files are needed for 3D product rendering?
The ideal inputs are approved CAD or a clean 3D model, exact dimensions, multi-angle photographs, material and colour specifications, label artwork, a variant list, brand references, a shot list, output sizes, and channel rules. STEP, IGES, FBX, OBJ, and GLB are common exchange formats, although suitability depends on the workflow.
If no model exists, 3D product modeling and rendering can begin from dimensioned drawings, photographs, sketches, and a physical sample. More complete references reduce interpretation and revision time.
Can a product be rendered before it is manufactured?
Yes. A product can be rendered before manufacture when the design information is detailed enough to build an accurate model. This is a core use of 3D product rendering for launches because marketing can begin while prototypes, packaging, or stock are still in production.
The brand must control revisions carefully. Every image should record the design version it represents. Before publication, compare the render with the final manufacturing specification so pre-launch visuals do not show features, accessories, finishes, or proportions that buyers will not receive.
Can 3D product renders look like real photographs?
Yes. Photorealistic 3D product rendering can look like photography when geometry, scale, materials, lighting, camera behaviour, colour management, and post-production are handled well. Realism does not come from render resolution alone.
The fastest quality test is a close crop. Inspect edges, labels, seams, transparent parts, texture scale, reflections, and contact with the surface. Realistic product rendering also benefits from modest imperfections. Perfectly uniform roughness and mathematically sharp edges usually reveal the digital model.
Is rendering better than product photography?
Rendering is better for pre-launch work, many variants, exact view consistency, internal explanations, and reusable animation or AR assets. Photography is better when the unique physical item, human use, natural variation, or tactile evidence is central to the sale. Many campaigns benefit from both.
The right choice depends on the number of SKUs, sample availability, update frequency, required channels, and expected reuse. Realistic 3D product rendering services should be willing to recommend photography when it fits the brief better.
Can one model support variants, animation, AR, and interactive 3D?
One model can support many approved colours and materials, plus animation, AR, and interactive 3D, when the geometry stays the same and each derivative is prepared for its channel. Every finish still needs material work, reference matching, naming, and QA. A red paint value cannot simply replace brushed steel or translucent plastic because the surfaces respond to light differently.
3D product design rendering is useful for comparing options before production. Final campaign variants should use the approved manufacturing finishes and artwork. High-quality 3D product renderings keep camera, scale, and lighting consistent so buyers can compare options fairly.
The same approved master model can support stills, animation, AR, and interactive 3D, but each output needs preparation. Animation may need rigging and component hierarchy. AR and browser viewing usually need fewer polygons, compressed textures, simplified materials, correct real-world scale, and device testing.
Product design rendering and real-time delivery should be planned together if both are in scope. That lets the artist preserve important details while building a lighter derivative. The production master remains the source of truth.
Who owns the 3D model and final images?
Ownership depends on the contract. The brand may receive usage rights to final images while the studio retains editable models and scene files, or the agreement may transfer specified source assets. Neither outcome should be assumed.
The quote should define rights for final stills, animation, textures, CAD-derived geometry, third-party assets, editable files, future variants, and archive access. 3D product modeling and rendering can create long-lived business assets, so ownership and reuse terms deserve the same attention as price.
What should brands take away from 3D product rendering?
Brands gain the most value when they treat 3D product rendering as a reusable visual production system built around one accurate master model. That model can support six core outputs, but every derivative still needs the right technical preparation, channel rules, and approval process.
Start with the product truth. Lock the design version, dimensions, materials, labels, variants, and intended channels. Approve geometry before polish. Review materials against known references. Define rights and reusable files in the quote.
Rendering is not automatically better than photography. It is stronger when launch timing, variant scale, hard-to-show details, and repeat use make physical shoots slow or repetitive. Photography remains the right choice when the individual item, person, or natural variation is the evidence.
